How to upgrade Windows Server 2003 to 2008
Suppose you have a server with an old Microsoft Windows Server 2003 operating system and you want to upgrade it to a newer Windows Server 2008 or 2012 version.
Some of you may have tried and found that the following procedure described by Microsoft can hide a lot of untold problems:
https://technet.microsoft.com/en-us/library/cc755199(v=ws.10).aspx
However, the above link allows us to know, depending on the starting operating system, which version of Windows can be installed as an upgrade.
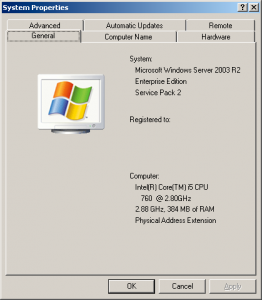
Just to be clear, we’ll start with the following operating system version:
1. Hardware/software prerequisites verification
It is important that Windows Server 2003 has at least Service Pack 1 installed (in our example, the version that will be updated is Service Pack 2) and that the new operating system (2008) and the one to be updated (2003) have the same language and architecture (32 or 64 bit).
This operating system can be upgraded to Windows Server 2008 Enterprise Edition SP2 32-bit (R2 version of Windows Server 2008 is available only for 64-bit architectures).
The first thing to do is to check if your hardware is compatible with the new operating system, by visiting this link:
https://technet.microsoft.com/en-us/windowsserver/bb414778.aspx
Once verified hardware requirements, if the server has Domain Controller role, we must prepare the server for the upgrade. If not the case, you can skip directly to step 3.
2. Domain and forest preparation
Once inserted new operating system DVD in the reader, you must copy \sources\adprep folder in C: and, from the command prompt, run the following commands:
C:
cd \adprep
adprep /forestprep
adprep /domainprep
adprep /domainprep /gpprep
At this point you may face some issue.
The schema master did not complete a replication cycle after the last reboot.
In this case you have to force replication with secondary domain controllers or, if not possible, temporarily disable replication.
First of all, check the error with the following commands:
repadmin /showreps
repadmin /showrepl
repadmin /replsum
Now, once you read the name of the server that creates problems, from Administrative Tools->Active Directory Sites and Services click on Sites->Default-First-Site->Servers, then right-click on the servers that create problems and finally click on “Replicate now“.
Check that everything is ok on both servers with the command:
dcdiag
If so, wait several minutes for the replication cycle to complete and try to launch the adprep /forestprep command again.
Adprep detected that the domain is not in native mode
If you see this error after the second adprep command, your domain controller is configured in compatibility mode, or Windows 2000 mixed, rather than in Windows Server 2003 native mode. To raise the domain functional level, from Administrative Tools->Active directory Domains and Trusts, right-click on the domain’s name and select “Raise domain Functional Level…“.
At this point, from the drop-down menu, select “Windows Server 2003” and click on “Raise“, then “OK” in the notification window that warns you of the irreversibility of the operation and finally “OK” when operation is complete.
Now you can launch the adprep /domainprep command again.
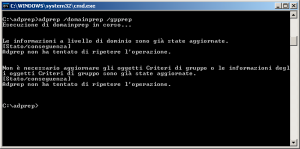
Without any further error, the output of the two commands will be the one shown below.
3. Compatibility check
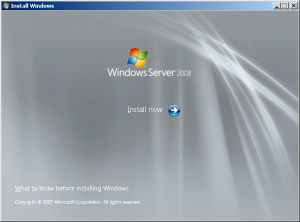
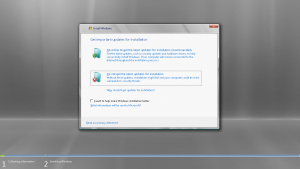
Now you can start the installation by double clicking on the setup.exe file on the Windows Server 2008 DVD:
In the first instance, we are asked if we want to download the latest updates from the Internet before proceeding with the upgrade. At this stage, if not strictly necessary (for example if required Service Pack 1 is missing), we will select “Do not get the latest updates for installation.”
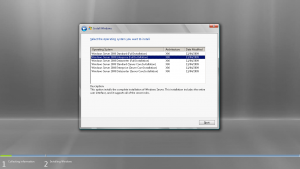
Then comes the selection of the operating system version to install, let’s choose “Windows Server 2008 Enterprise (Full Installation)“.
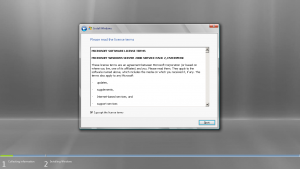
Then it’s time to accept the license terms:
After that, we will select the “Upgrade” type of installation:
and so we are at the crucial point, the compatibility check, where we could have some problems, for which we will provide a quick solution.
Remote Storage Service
An error that may occur is:
Uninstall the following Windows components and features:
Remote Storage Service - Please read Microsoft Knowledge Base article: 935867
In this case you simply have to uninstall a Windows component: from Control Panel->Add or Remove Programs->Add/Remove Windows Components, uncheck the “Remote Storage” item and click “Next”. When done, click “Finish” and reboot the server.
Windows PowerShell
Another common problem is the presence of Windows PowerShell v1.0 that, despite the various articles in the network, can not be removed if the operating system has a Service Pack. The error is:
Uninstall the following programs:
Windows PowerShell
A solution that easily works is to rename WindowsPowerShell folder (eg in WindowsPowerShell_Old). It is located, depending on the architecture, in:
Windows Server 2003 32-bit: %windir%\System32\WindowsPowerShell
Windows Server 2003 64-bit: %windir%\Syswow64\WindowsPowerShell
The update will then reinstall PowerShell, and you’ll be able to delete the old folder without any problem.
Print Server Role
Another common warning, not critical for the upgrade, is:
You can still upgrade, but the following Windows features and components might not work after the upgrade:
Print Server Role - Please read Microsoft Knowledge Base article 938923.
If you still want to remove this warning, by performing a printers backup for the subsequent recovery on Windows Server 2008 after the upgrade, check out this link:
https://support.microsoft.com/en-us/kb/938923
4. Upgrade process
Once solved all the problems, Windows Server 2008 upgrade will take place: sit down and relax, waiting for files installation and system configuration, which involves several reboots.
5. Post-upgrade operations
After the upgrade you will be presented the Windows Server 2008 login screen: you can now login using the same credentials of an authorized user on the previous Windows version.
If, after loggin in, you face an error in the Server Manager snap-in, all you have to do is continue the installation of Microsoft .NET Framework, as asked by the operating system.






1 Comment
Nice work, especially the powershell side.
Some individuals don’t know that trick.